


Price: $39.99 - $16.99
(as of Feb 06, 2025 06:07:45 UTC – Details)

Product Description

How to Use AC Mode for Accurate Scanning: Step-by-Step Guide
Description: Learn how to use AC mode on your scanning tool for accurate detection of live AC wiring. Follow these simple steps to ensure a safe and efficient scanning process.Step 1: Turning on the tool and selecting the modeTo start, turn on the scanning tool by pressing the ON/OFF button while the tool is in the air. Then, select the AC mode or Metal mode depending on your requirement.Step 2: Calibrating the toolNext, press the Calibrate Button to start calibration. Wait for the decreasing bars to disappear and for the buzzer to beep once to confirm that the calibration is complete. Release the scan button.Step 3: Scanning the wall for live AC wiringPlace the tool against the wall and slowly slide it across the surface. Look for the location where you get the highest AC indication, indicated by the most middle bars on the screen. If a strong target is detected, the top indicated arrow will show, and a steady beep will sound. Continue in the same direction until the display bars reduce. Reverse the direction and mark the spot where the display bars peak from the reversed direction. The midpoint of the two marks is the location of the center of the live AC wiring.Step 4: Reducing the sensitivity of the toolIf the unit indicates live electricity over a large area, you can reduce the sensitivity of the tool to refine the scanning area and more accurately locate the live AC wiring. To do this, release the Scan button and turn the unit off. Then, turn it back on and start scanning the wall over one of the previous marks. This will reset the tool to lower sensitivity and narrow the scan area.Step 5: Precisely identifying the location of live AC wiresScan the area in both directions as described in Step 3. The area indicated should become smaller, allowing you to more precisely identify the location of live AC wires.By following these simple steps, you can use AC mode on your scanning tool to accurately locate live AC wiring and ensure a safe working environment.

 Specification:
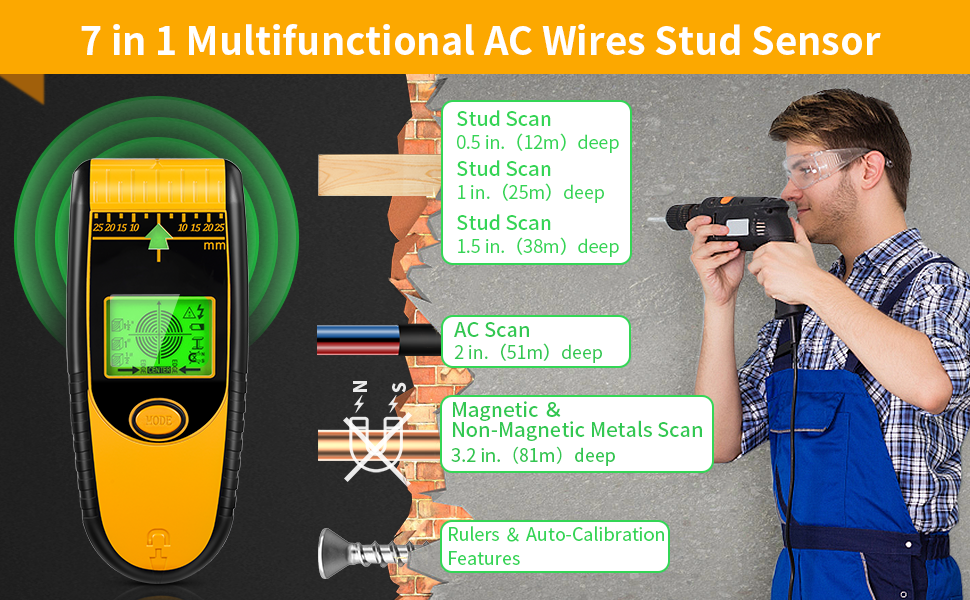
Working temperature: 0~40°Operating voltage: single 9V batteryWorking current: <20mAProduct size: 185*80*23mmThe product has a scale ruler function Professional 7 in 1 Function
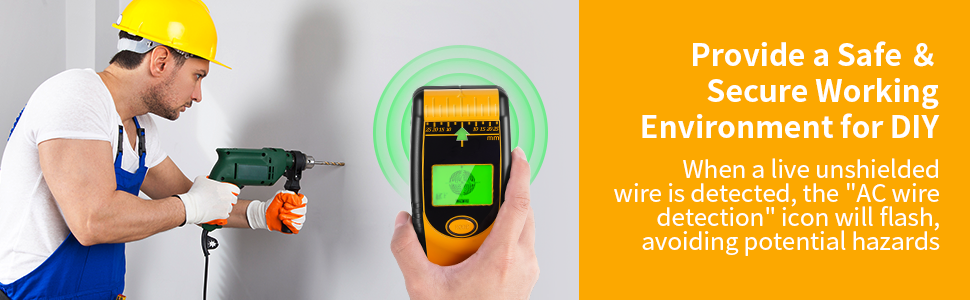
Why a Stud Finder is Essential for Your DIY Home Projects
No More Error Holes on the Wall
Whether you are hanging pictures, putting up shelves, or starting a new home addition, knowing where the studs are in a wall is crucial for a successful project. A good stud finder can be the difference between a job well done and a disaster.
Our stud finder uses UPGRADED SMART SENSORS that can sense the change in density in the space behind the wall. This allows the tool to locate the stud center with GREAT ACCURACY, making your DIY home projects easier and more efficient.
Smart Sensors for Accurate Stud Detection Make DIY Home Projects a Breeze Invest in a Quality Stud Finder Today
How to Find Studs
Calibrate the tool before each scan, hold the tool vertically up and down, place it on the surface to be scanned, and do not rotate the tool.
Step 2
Move the tool evenly and slowly over the construction wall surface. The tool must be held against the wall during scanning, and if the scanner is accidentally shaken or lifted, the device will need to be recalibrated.
Step 3
Continue to move. When the center of the keel is reached, a “beep” sound will be heard. When the signal is full and the beep sound is loudest, it means that you have found the center of the object, please mark the object with a pencil.
Invest in a Quality Stud Finder Today
A good stud finder is an investment that will pay off in the long run. Our stud finder is easy to use and provides accurate results every time. Don’t risk damaging your walls or having to start over on your DIY home projects. Get our stud finder today and make your DIY projects a breeze!
Are you looking for an essential tool to help with your renovation needs? Look no further than our Electronic Stud Finder – the perfect solution to help you complete your renovation work quickly and efficiently.
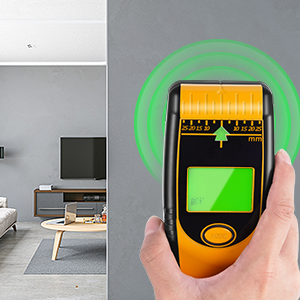
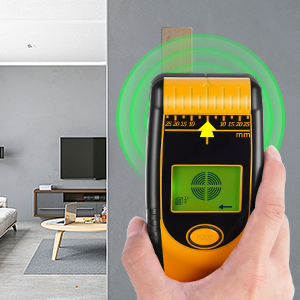
Equipped with 4 advanced upgraded sensors and a magnetic stud finder function, our wall scanner provides higher accuracy than similar products, making it easier to locate the specific location of wood, wire, metal, nails, pipes, and other building materials in walls.
Our 7-in-1 multifunction scanner has 3-level wood beam keel detection modes that can locate up to 1/2″ (13mm), 1″ (25mm), and 1 1/2″ (38mm) studs. It also features an AC scan mode that detects AC wires up to 2″ (51mm), metal scan mode that detects metal up to 3.2″ (81mm), ruler function, and auto-calibration.
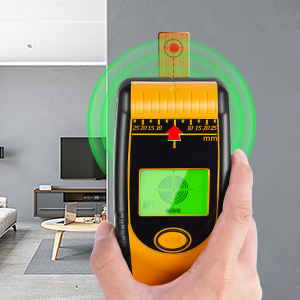
Using our Smart Stud Sensor is a breeze – simply turn on the “Wall Detector” button, press and hold the scan button to start auto-calibration, and move horizontally against the wall. The LCD screen displays the required stud material and the exact location of the stud, and displays a red light and buzzer when an object is detected on the wall.
Our wall-mounted scanner has a backlit LCD display and a three-color LED display (green light – no signal, yellow light – signal, red light – strong signal). It also has a low battery indicator, 9V carbon battery power supply (included), automatic shutdown after 180 seconds of no operation, power-saving mode, maximum working current 15ma, and continuous use for up to 6 hours.